3D Camera
Create 3D camera that render scene to surface.
Node Data | |
|---|---|
| 3DArray | |
Display name | |
3D Camera | |
Internal name | |
Node_3D_Camera | |
Inheritances | |
| node | |
| node_processor | |
node_3d | |
node_3d_object | |
| node_3d_camera | |
Inputs | |
node_3d_object | |
vec3 |
Position |
quaternion |
Rotation |
vec3 |
Scale |
vec3 |
Anchor |
node_3d_camera | |
int |
Fov |
vec2 |
Clipping Distance |
dimension |
Dimension |
enum |
Projection |
d3scene |
Scene |
color |
Ambient Light |
bool |
Show Background |
enum |
Backface Culling |
float |
Orthographic Scale |
enum |
Postioning Mode |
vec3 |
Lookat Position |
rotation |
Roll |
rotation |
Horizontal Angle |
float |
Vertical Angle |
float |
Distance |
bool |
Gamma Adjust |
surface |
Environment Texture |
bool |
Ambient Occlusion |
float |
Ao Radius |
float |
Ao Bias |
float |
Ao Strength |
int |
Round Normal |
enum |
Blend Mode |
Outputs | |
node_3d_camera | |
surface |
Rendered |
surface |
Normal |
surface |
Depth |
3D Camera Node render out 3D Scene to 2D image similiar to camera in other 3D softwares. Camera node comes with multiple positioning mode to make it easier to position and animate the view.
Preview
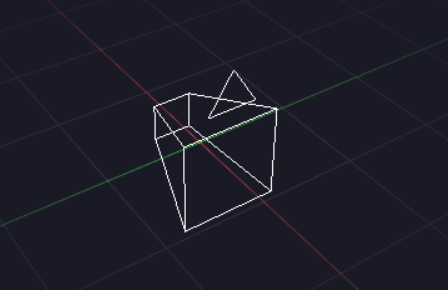
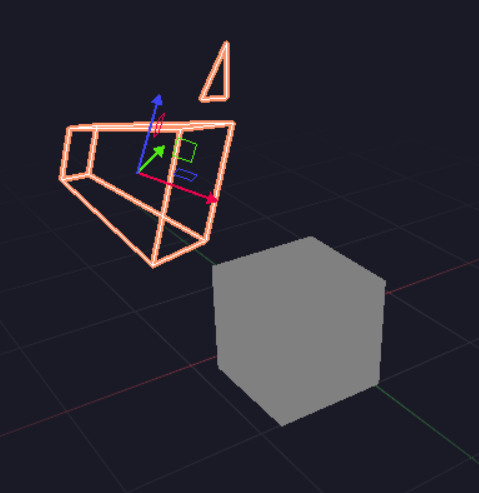
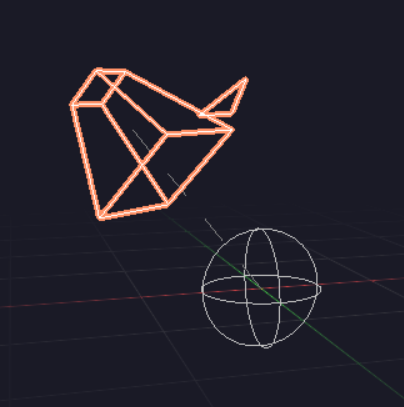
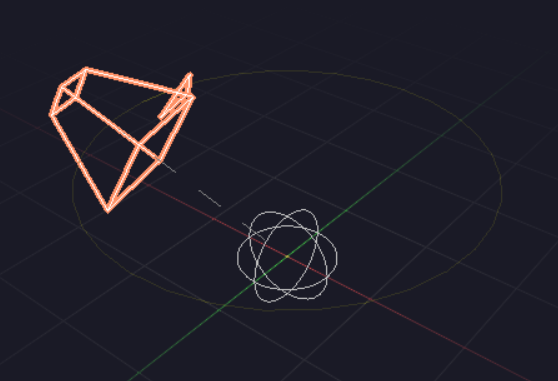
Camera node represent itself by a camera gizmo. Preview tools will change depends on the Postioning Mode.
Camera Properties
Camera properties are parallel to physical camera. Apart from basic transformation, some important properties are:
Projection
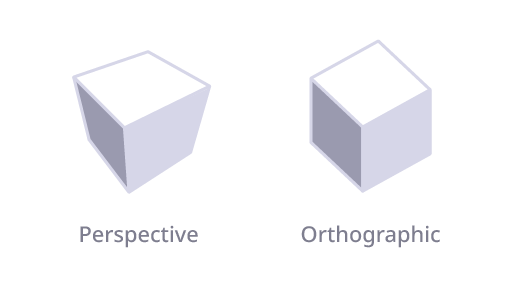
Projection type of the camera. It can be Perspective or Orthographic.
Field of View
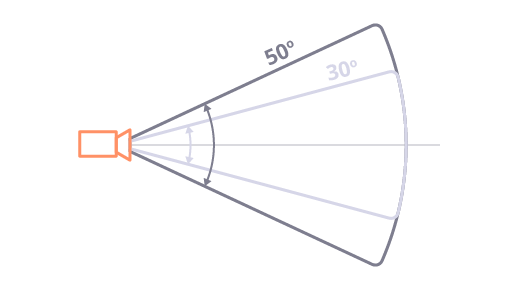
When using perspective projection. Field of View control the angle of the camera view frustum. Larger FOV will result in wider view, and vice versa.
Orthographic Scale
When using orthographic projection, the camera position will not have an effect on the view size. Use Orthographic Scale to control render area.
Clipping Distance
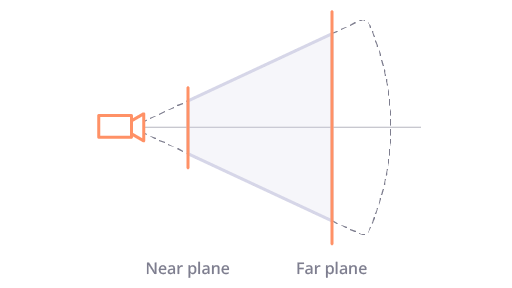
Clipping distance determine the depth of the camera frustum aka. the range of distance the camera can see. While this may tempt you to set clipping distance as wide as possible, large clipping distance can cause rendering artifact (especially with shadow). Thus choose clipping distance based on the scene and camera position.
Positioning Modes

Camera nodes comes with 3 positioning modes for ease of positioning and animating camera.
Position + Rotation
The default settings. Set position and rotation of the camera directly.
Position + Lookat
Set position of the camera and the position where the camera is looking.
Lookat + Rotation
Use for rotating camera around a point. Set a center point and horizontal, vertical angle, distance of the camera.
Render Settings
Ambient Light
Color of the ambient light. Ambient light is a constant light that affect objects in all direction.
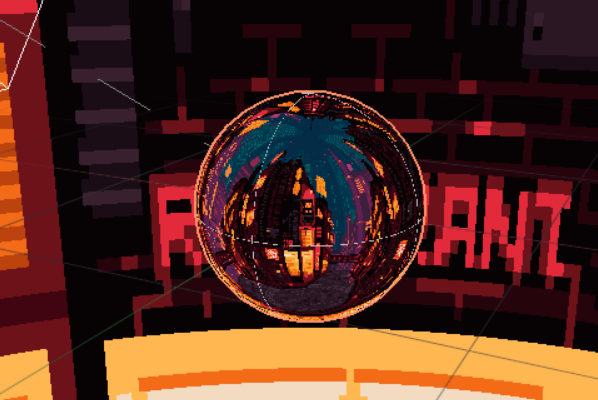
Environment Texture
A texture that will be used as background of the scene and reflection. Use the "Show Background" settings to control whether the background will be show in the rendered image.
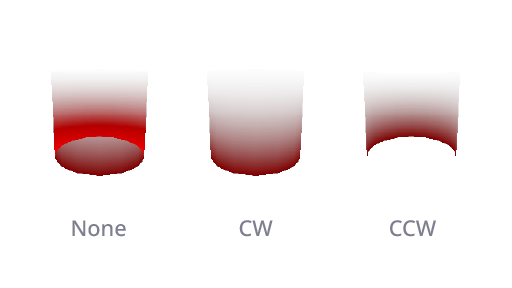
Backface Culling
For optimization reason, the model will only render one side of the model and the backface will be transparent. This settings control whether to render only frontface, backface or both.
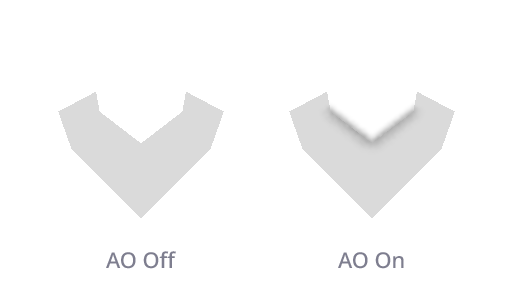
Ambient Occlusion
Ambient Occlusion is a shading method that darken the area where light is hard to reach (e.g. corner, inner edge) to simulate the effect of environment light. It can be used to add more depth to the scene.
Effects
Effects are post processing effect the can make modify the rendered image. Currently, there are only 1 effect:
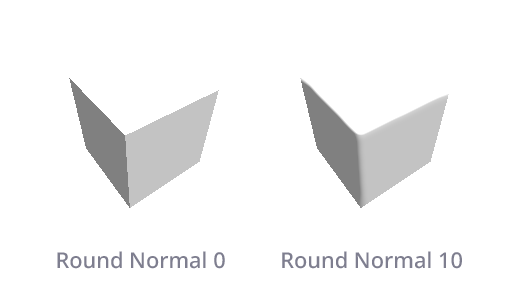
Round Normal
This effect will blur out the screen-scale normal which create a softer edge.
Outputs
Camera node has 3 outputs, by default only the "Rendered" output is visible.
